
Savory
Tuna-Celeriac Fish Cakes
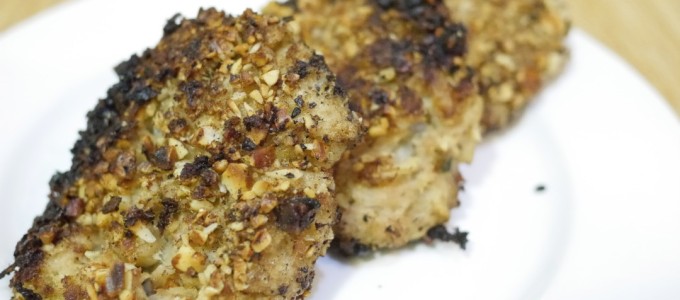
Apparently, I’m still on a root vegetable kick. Or perhaps it’s more accurate to say that I am still feeling overwhelmed by my winter CSA. My kitchen is currently filled with potatoes, sweet and ordinary. It’s filled with turnips and rutabaga. It’s filled with carrots, parsnips, and radishes. And this past week brought us two particularly knobby, particularly ugly celeriacs.
I say that the celeriacs are knobby and ugly, but here’s the thing: I actually kind of love them. For a long time, I only knew how to do the one thing with them, and that was salad. The classic French preparation for celeriac is to cut it into slivery matchsticks, arrange the matchsticks over a bed of lettuce, and dress the whole thing with a remoulade sauce. It’s delicious. But there’s only so much mayonnaise-based dressing you want in your life. It’s — let’s say — a definite sometimes food.
Biscuit-Topped Pork Pot Pie
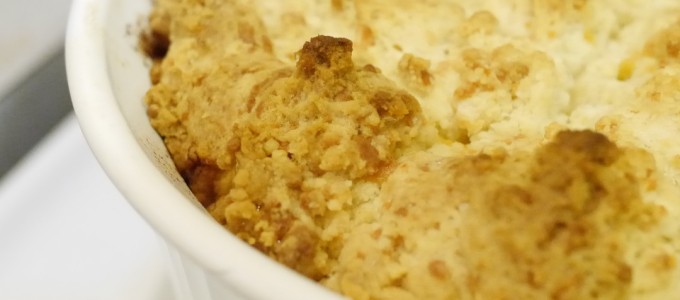
There’s two things that I’ve been thinking about for the past little while. The Odyssey and winter cold. The reason for the latter should be pretty obvious at this point. But the reason for the former — not so much.
For the past little while, I’ve been teaching The Odyssey in one of my classes. We’ve gone through the crazy islands. We’ve talked about gender dynamics, gift economies, and the importance of hospitality in a culture that predates hotels by several millenia. And on that last point — on hospitality — I’ve told my students that the dude to look out for is Eumaeus.
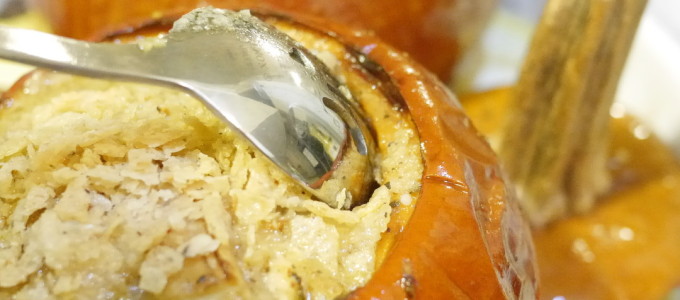
Gluten-Free Quiche with Potato Crust
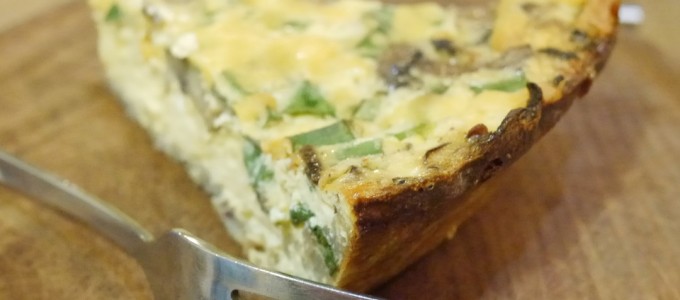
Gluten-free cooking is a particularly interesting challenge for me. I don’t know how far you all have read back in Twice Cooked, but if you know anything about me and my relationship to food, you’ll know that I’m a little like bread flour: I form strong gluten bonds. I can be pretty judgmental toward folks for whom gluten-free eating is a diet fad. And I am given to rant, if folks will let me, about the con-artist industry that has grown up around selling vulnerable people expensive bread substitutes by playing on their fears about industrial agriculture’s handling of wheat.
Bread, it seems to me, is one of our oldest, most enduring signifiers of civilization. And there is a way in which gluten-free diets are about undermining bread not just as a food, but as a thing that encapsulates the bonds of community that hold us together in relative peace.
Curried Sweet Potato Pancakes
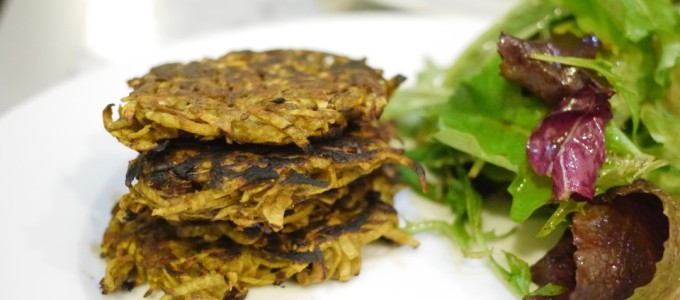
Root vegetable pancakes are a great tool to have in your arsenal of winter cooking tricks. If you’re like me and you try to eat seasonally, there will undoubtedly come a point where you’ll look at box after box of turnips and parsnips and yams, and you’ll be all like: what on Earth am I going to do with these that I didn’t do last night, or last week, or last year?!
Don’t get me wrong. I like winter vegetables. But especially when we’re crunched for time, there’s a kind of monotony to the root vegetable rigmarole: roasted, or pureed, or turned into soup. Again and again and again.
Kkakdugi Kimchi (or, Kimchi Made From Big Honking Radishes)
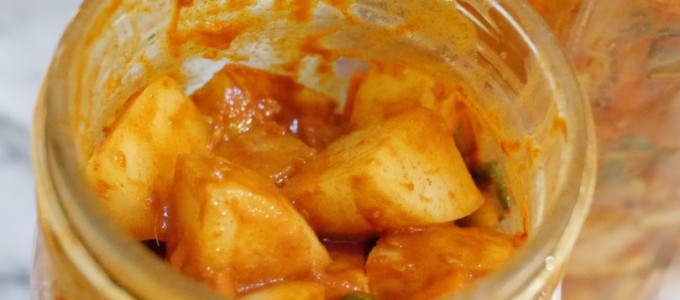
I like most pickles. Obviously. But if I had to compile a list of four or five favorites — of the sorts of pickles I couldn’t do without — kkakdugi kimchi, or kimchi made from big honking radishes, would definitely rank. I’ve talked about them here before. In this other post about pickled daikons, I believe I said that because my preparation owes so much to Lauryn Chun and to Maangchi’s fabulous Korean food blog, I probably wouldn’t be posting a version of it here.
But that was then, and this is now. And in the meantime, I’ve changed my mind.
I found myself in the produce aisle at the grocery yesterday, staring at some very pretty, very large daikon radishes. And I thought to myself: I want kkakdugi! And then I thought to myself: since I’m going to make it anyway, I might as well make enough to share.
Black Eyed Peas, Vegetarian Style
Wow. It’s 2015. Happy belated New Year, everybody. It seems — somewhat unintentionally — that I have taken a hiatus from making posts here. I must have needed a break I guess. Which is odd because I certainly didn’t take a break from cooking. The end of 2015 saw a flurry of cooking for Chanukkah — soul-food Chanukkah dinner for 22 — and then a flurry of soups — squash and chicken all around — and then yet another flurry for New Year’s Eve.
But regardless: I’m back. And I’m ready to cook. And I’m ready to write. And though I don’t really — as a rule — make New Years resolutions, I’m back with a couple of New Years resolutions for the blog.
Pumpkin-Poultry Pot Pie
I agonized — let me tell you — about what to call this recipe. First, in my head, it was a pumpkin pot pie. But that sounded too much like a plain old pumpkin pie; or like a pot pie with little chunks of pumpkin floating around. Not appetizing. Then it was a poultry pot pumpkin. That, I thought, was cleverer. But it was unclear to the folks on whom I tested it what the pot meant, given that we don’t live in Colorado or Washington State. I went back and forth until Sarah finally told me: why don’t you give it a descriptive — not cutesy — title? Your readers will appreciate it, and the fairies at Google who decide how to rank pages will appreciate it too. So I did. And it’s what you see above.
But no matter what this dish is called, here’s the important part: there’s lots of stuff floating around on the Internet about what to cook for Thanksgiving. I’ve posted here, in fact, about how one might go about roasting a turkey, making squash side dishes, and even pumpkin mousse. But what’s really important in this season of too much food is not what you do on the day itself, but — clearly — how you handle the leftovers.
Caramelized Onion Tart, 2014 Edition
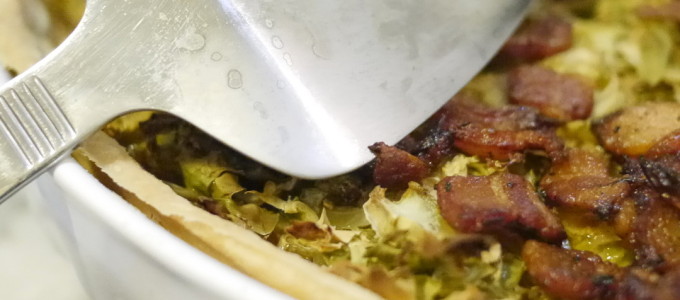
Is your old model caramelized onion tart starting to feel long in the tooth? Do you bring it to parties only to have your friends and family give it a big ho hum? Well I’m here to tell you, folks, that the new and improved Twice Cooked onion tart is here to save the day, taking your allium game from old to new.
That’s right. Just in time for your Thanksgiving feast, we’ve upgraded our caramelized onion tart from one featuring Manchego cheese and a few Walnuts to one bursting with bacon, Brussels sprouts, and a cheddar so sharp that it will make the back of your tongue convulse with joy (your Cheddar may vary).
Klingon Gagh
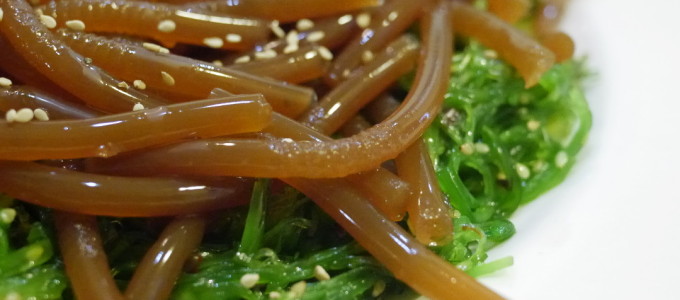
Klingon gagh, no doubt, is the iconic food of the modern Star Trek canon. Whether it’s on The Next Generation or Deep Space Nine, whenever a group of Klingon warriors congregate together to share a meal and sing a song, there are two things of which you can always be assured: first, that there will be loud calls, in mixed tones of anger and levity, for another barrel of blood wine; and second, that there will be the relished consumption of gagh.
According to Memory Alpha the great wiki repository of all things Star Trek canon, gagh is a Klingon delicacy made from serpent worms. Although most Klingons preferred it live, it could also be served stewed or cold.